
Go with your gut…
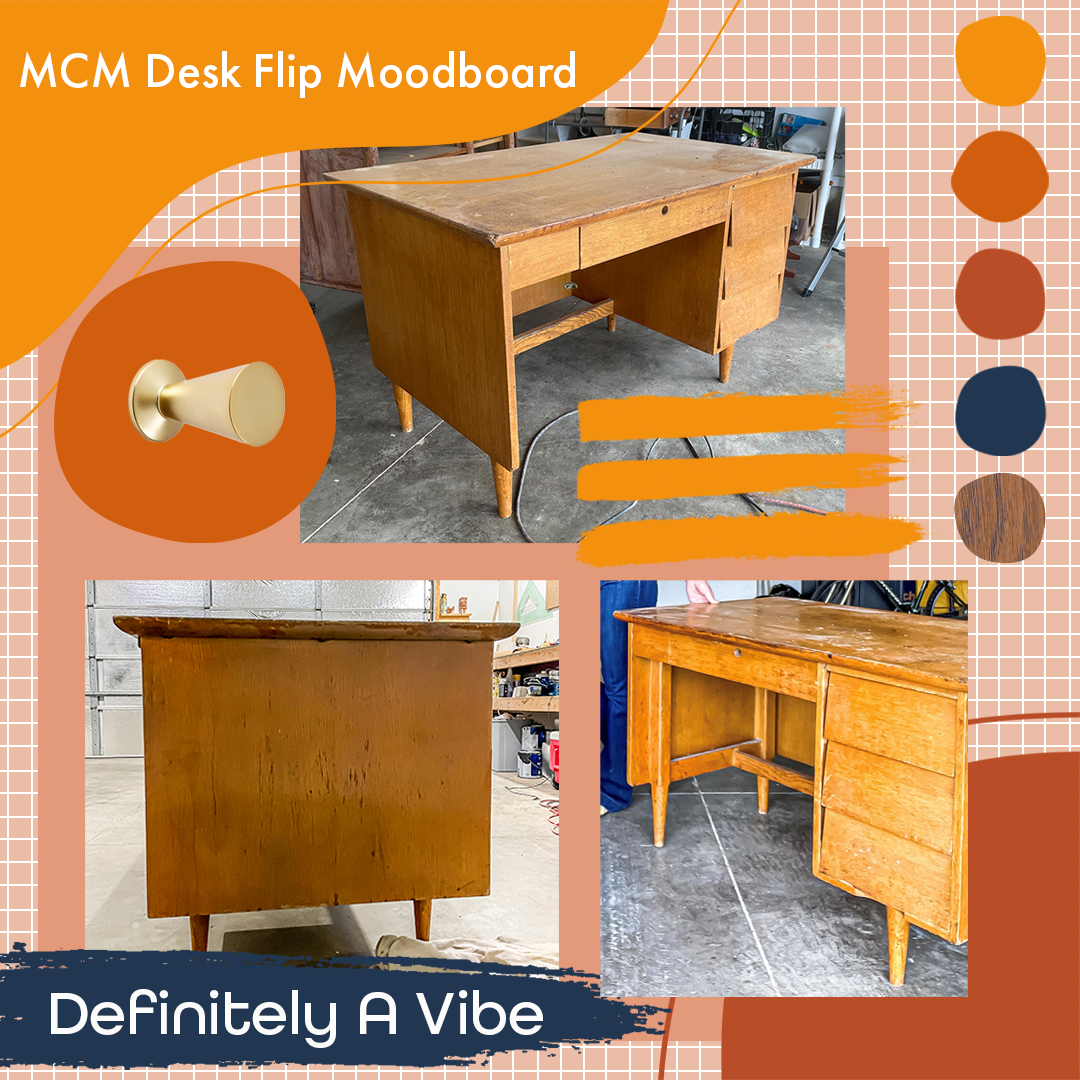
I love bold, modern, and eclectic design. And as much as I present myself as someone who doesn’t give a fuck about what other people think, I often second guess myself during my design process and wonder whether people will like what I come up with in the end. At the beginning of this flip, I found myself spending hours drawing up different color blocking and paint design concepts I started to resent my process. Late one night after sketching another option it just hit me that I was wasting my time. I knew I wasn’t going to paint any of these options because I didn’t like them to begin with. I had wanted to paint this desk this way from the moment I saw it on Marketplace and I was just trying to make sure I could justify it to the masses. But why? It’s MY desk! Y’all are here because you like to see what I come up with, not because I try to fit what everybody else wants. So I stopped sketching and just went for it.
You just gotta go with your gut. And today I’m glad I did.

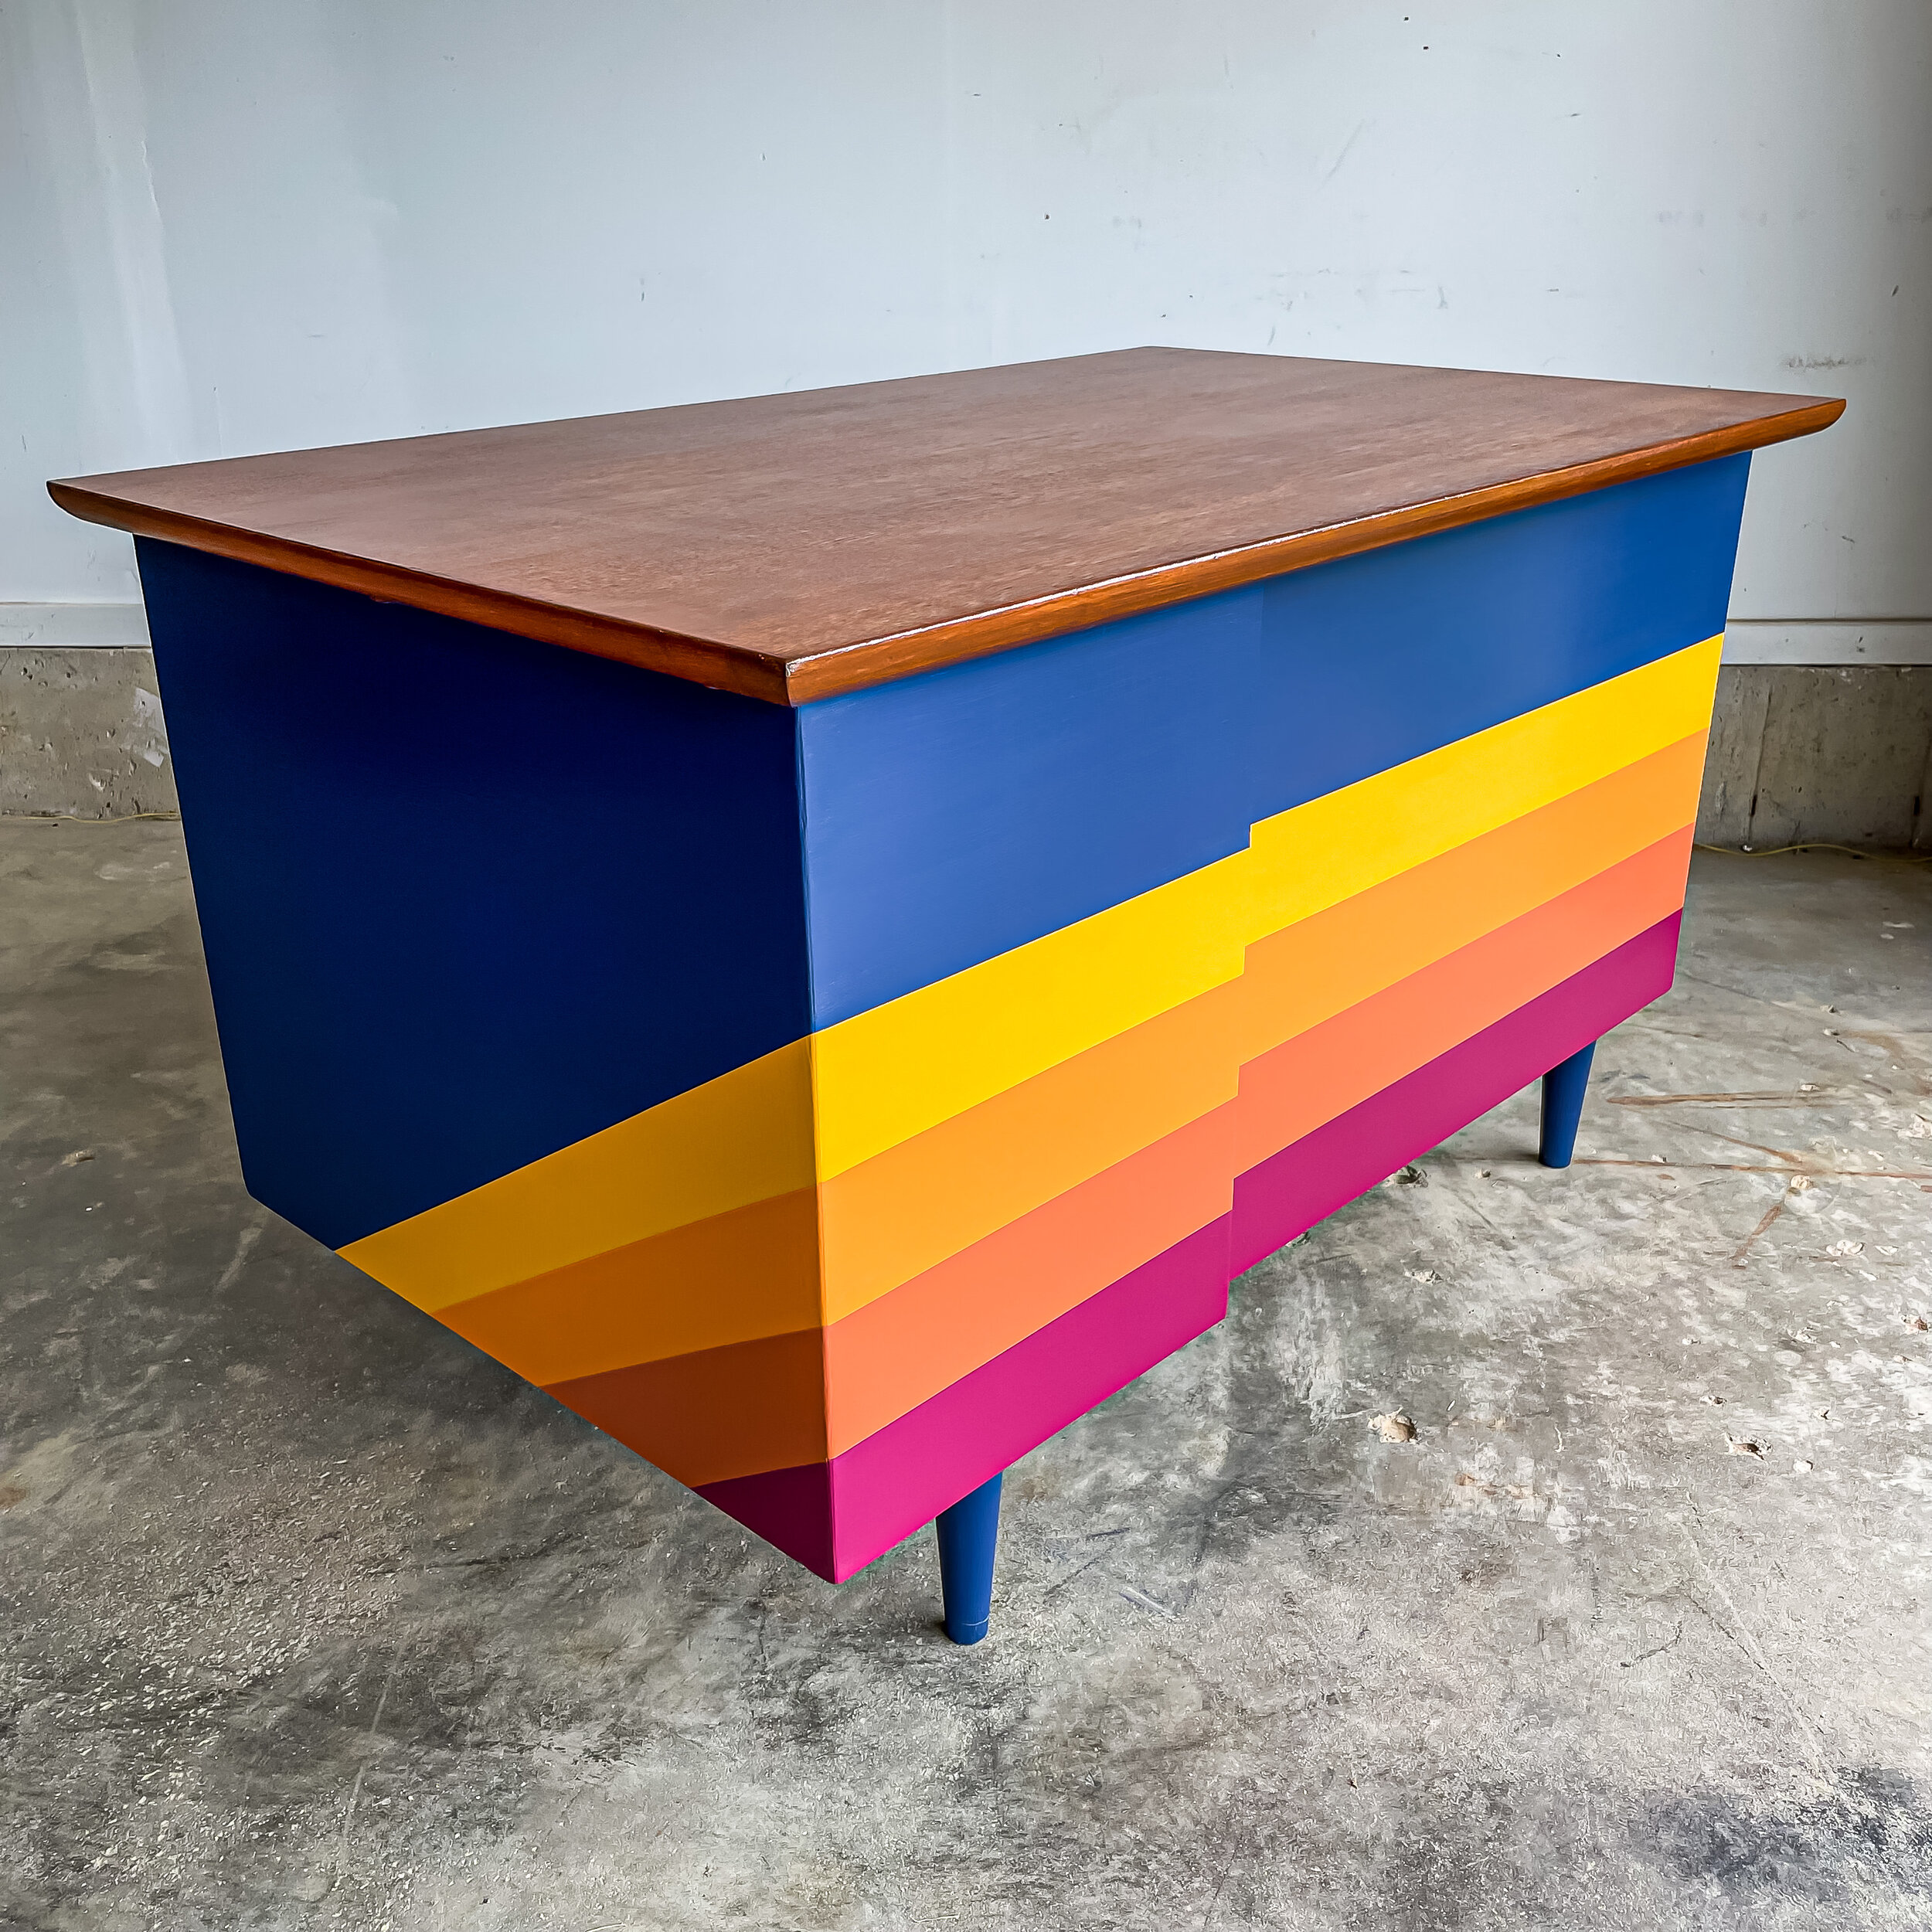


How to get crisp stripes. Every time.
-
Step 1:
Choose your stripe colors and paint your surface completely with the lightest one first. Paint as many coats as you need until you are absolutely sure you don’t need to touch up any areas. Once the surface is completely dry, map out your stripes using painter’s tape.
-
Step 2:
Before painting your second color, paint over top all the painter’s tape seams with the color you originally painted the surface. This activates the tape, creating a seal, so your second color doesn’t bleed underneath it. THIS IS THE MOST IMPORTANT STEP!
-
Step 3:
Once dry, paint your surface with your next lightest color. Paint as many coats as you need until you are sure you don’t need to touch up any areas. While your final coat is still wet, slowly remove the painter’s tape- make sure to hold the removed tape as you go so it does not accidently touch the wet surface! Repeat these steps for each stripe made with a new color.
Linked Supplies
Repairs:
Paint and Varnish stripper
Wipe your piece down with mineral spirits after using the paint striper to remove any residue
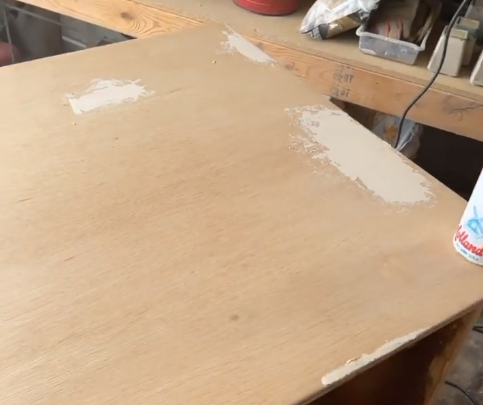
Stainable wood filler
Putty knife
Sanding block multi pack
Orbital sander
Sanding disc variety pack
Painter’s Tape - due to the amount of stripes I was painting, I wanted extra sticky painter’s tape. This tape is specially designed for sharp lines, perfect for stripes!
Staining:
I use rags made from Alex’s old white T-shirts to apply stain. If you don’t have any of your own available, you’ll want a lint-free cloth
Wood conditioner - a must-have. This stuff prepares bare wood for staining. It penetrates the grain of the wood to for uniform absorption of oil-based stains
Stain - if you followed along with my stories for this flip on Instagram or have checked out the highlight, you know I had large repairs on this desktop and wanted so badly to avoid having to paint over
the veneer. The results from using this stain are UNREAL. First I applied one coat of stain using a lint-free cloth. Next, I reapplied the stain using a coarse, natural brush making sure my brush
strokes over the repairs mimicked the direction of the wood grain on the rest of the desk top. This stuff is magic!!! you cant even see the repairs!! This stain is called Premium Teak 120.
Paint Brushes: I am partial to Purdy. They are very affordable and great quality. most of my brushes are 2 inches wide, but I always have at least one of each of these on hand:
- Paint brush
- Top coat brush
Paint and Top Coat:
Paint - 1 Quart- Valspar Cabinet and Furniture Enamel Interior Paint- Satin Finish
Colors: Dress Blues, Mod Yellow, Amber Wave, Red Cent, and Framboise by Sherwin Williams
BB Frösch as always!
Top Coat - Varathane Clear Satin Water-Based Interior Polyurethane
Hardware - Brass color